So, it's been awhile. As of today, it's been three months and two days since last I updated. I'd meant to get around to writing sooner but... Well, let's just say, life got in the way. And because of that, customizing wasn't the first thing on my list. But I finally cracked down on myself and got back to work.
When last we met, Crocker looked somethin' like this...

Here, he'd only had a basecoat done, and his wing armatures were made. And darn those little wings... In an earlier post, I shared a video showing how to make fairy wings out of wire armature and stockings. Unfortunately, that only seems to work for larger wings that don't have so many curves. I don't have a photo of my failure, but rest assured it didn't work. So it was back to square one.
A while back, the amazing Shauna had told me about something called Fantasy Film. It was shiny, colored cellophane that, when heated, fused itself to wire and changed color.
(Photo from Etsy)
I'd seen a few tutorials on how to use this stuff, and I was good as sold. Shauna had linked me to a store on eBay that sold it, and after a few days, I was back to the races.

(That is 48 whole feet of Purple Flash fantasy film. Got it for less than five bucks.)
While waiting for the fantasy film, I began more work on Crocker himself. I still had a mane and tail to do, as well as eyes and hooves.

Okay, let me explain. I often find it tedious beyond reason to get a straight, smooth line along where the mane or tail meet the body on a horse. In fact it can be very annoying to get it just right. So, my solution here was masking tape around the areas I didn't want to be painted blue.

Ehh. Too blue. Will fix later.
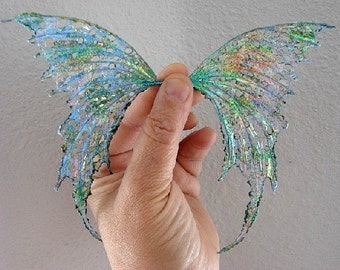
My fantasy film had arrived in the mail at last, so now it was time to work on those darned wings.

I cut four squares of film, and ran a small amount of superglue along the shape of the wing. I laid the film over that, smoothed it out, and ensured everything was sticking correctly. I flipped the wing over, did the other side, then preceded to the next wing. Very simple process.

(It was windy, hence the clothespins. They were weights.)
This process was also very closely observed by a rather curious little Lab...

"But can I eat it?"
Once the wings had dried, I trimmed the excess film and set them aside. Now it was time to fix Crocker. I mixed up a bit of paint and did some washes over his mane and tail to make them less blue. This of course turned into a bit of a Sleeping Beauty moment - first it was too blue, then too pink, then too blue... Finally I got it right. Then I decided to do a tiny bit of shading and finish the detail work.

Using the pastel method, I shaded on his legs and wherever there would generally be shadows. His hooves were painted with some blue, and he was given basic black eyes. (The eyes on a G2 Arab are very tiny, so detail is nigh impossible.)
Next part was spraying him with some finish. We have several cans of spray paint, primer, and finish in our basement, and some of them look the same. I nabbed one that said "Satin finish" and headed outside to spray. I decided to do a test shot first, just to make sure I had a good stream...

Oh. Ohhhh.

That right there, kids, is hunter green spray paint. And I almost shot it onto Crocker. I've never been so grateful for my intuition telling me to test first. If I'd sprayed him without checking, I surely would have ripped off my own face. Back inside I went, and got the right can.

(I don't know why my camera picked him up as being so blue. He's far more violet.)
He's dry! We're in the home stretch! Now to attach the wings, do some last minute details, and off he goes!
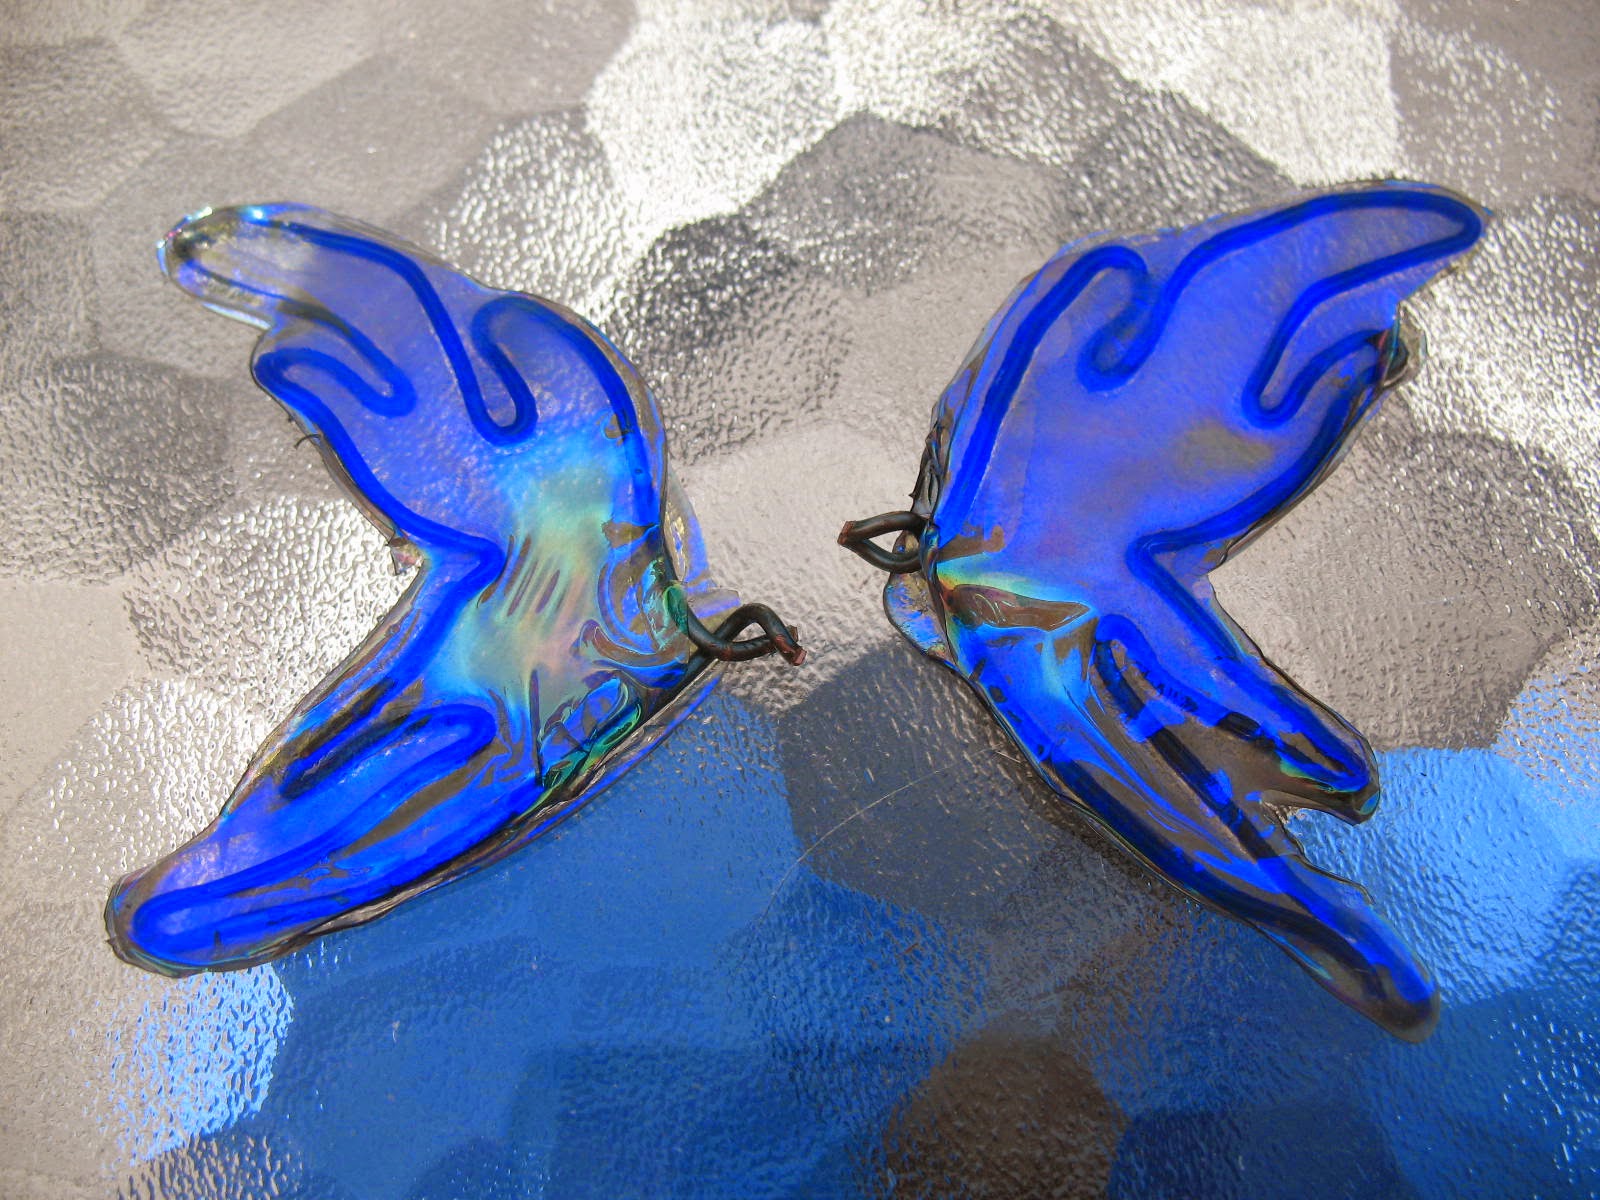
Here we have the wings (the "stems" were trimmed down as they would never have fit in his wing holes). I used the soda-glue method for attaching his wings.

First wing, done! It dried in no time at all, and was free-standing. (And it covered the gaping wing holes, yay!)
For those not familiar with the soda-glue method, it's very simple. I put a few drops of superglue in the wing holes...

...dipped the (dry!) wing stems into some baking soda...

...and quickly put the stem into the hole. And viola! Instant, strong bond!

"I'm gonna fly away now."
After allowing the glue some time to fully dry, I put a tiny dab of clear nail polish over each eye (it adds realism) and signed his inner back leg near the tail. Then it was more drying, some very meticulous packing (I once received a broken horse I was supposed to send as a Secret Santa gift... not letting THAT happen again!), adding chocolate and a post card to the box, and flinging him to Canada.

So long, little dude! It's been fun.
Wait a minute, I'm not done with you yet! If you'd be interested in purchasing some Fantasy Film for yourself to try making wings for ponies (or dolls), I'd suggest buying from Morezmore. You get a ton of it for a low price, they ship fast, and they included a free tiny detail brush.
I've got a few projects I'm working on, plus I have an "In The Mail" segment I'll be posting soon. Stay tuned!